Description
Sensor Variations
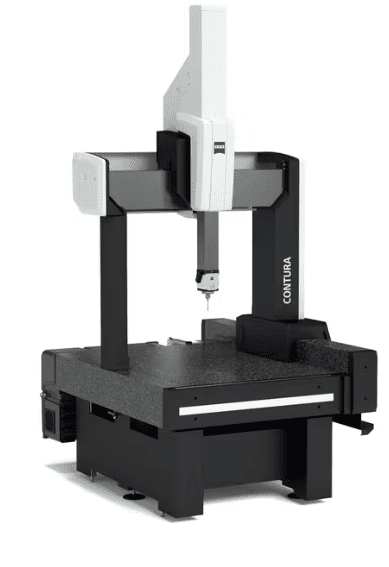
ZEISS CONTURA comes with a fixed passive sensor, the flexible RDS articulating probe holder (or with an active scanning probe). All sensor variations enable scanning. ZEISS navigator technology comes standard with the active version – for smooth measurements without a stop & go.
Robust and Precise
Depending on the configuration, ceramic or CARAT guideways are used on ZEISS CONTURA for high rigidity, low thermal expansion and minimal moving weights. Air bearings in all three axes ensure consistent stability even at high travel speeds and acceleration. The floating glass ceramic scales on ZEISS CONTURA are practically expansion free and therefore do not require any additional temperature sensors or mathematical compensation. They are suitable for the shop floor and are protected against contamination and other influences.
Computer-Aided Accuracy (CAA)
The bridge is subjected to dynamic forces that can affect accuracy, particularly while scanning. ZEISS CONTURA calculates the compensation for such inertia effects. This ensures that the required precision remains intact even at high measuring speeds.
Convenient Control
The system is controlled via a user-friendly control panel and does not need a computer. The progressive joystick enables easier and more precise control of all axis movements. The speed can be regulated in CNC mode.
Direkt
The direkt sensor model is ideal for the measurement of small parts with perpendicular geometries without inclined features. Equipped with the ZEISS VAST XXT scanning sensor, ZEISS CONTURA direkt provides a particularly affordable means of entering the world of scanning technology from ZEISS for production and progress inspection of single processing stages. The alternative XDT single-point sensorcan be retrofitted on VAST XXT from ZEISS as needed. ZEISS CONTURA direkt is available up to a size of 10/16/6.
RDS
Combined with the VAST XXT sensor from ZEISS, the flexible, RDS articulating probe holder enables the scanning of features in all angular positions. With a total of 20,736 positions at 2.5° increments, RDS can reach virtually any spatial angle. This is particularly advantageous for the measurement of complex parts, for which specific stylus configurations have to be created. Calibration times are kept to a minimum thanks to optimal calibration routines. RDS also enables the use of optical sensors from ZEISS on ZEISS CONTURA.
Aktiv
ZEISS CONTURA aktiv comes standard with navigator technology for fast scanning in one smooth run. It can be operated with the VAST XTR gold or VAST XT gold active scanning probes from ZEISS – and is particularly wellsuited for the measurement of deep and offset features with high throughput rates. Both sensors use the same receptacle. Existing measuring programs can be used following conversion. The QuickChange fast stylus change-out system is also an option.

