It’s all about the value proposition.
The I 75 corridor in northern Kentucky is known for automotive parts manufacturing. One supplier who specializes in CNC machining of engines for two Detroit automakers has realized the value having Carl Zeiss and Inspection Engineering for a partners in metrology.
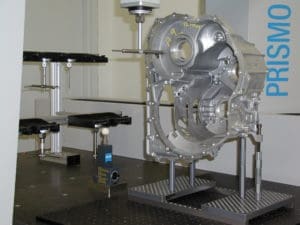
Currently the plant operates three Sheffield touch probe CMMs and three Zeiss scanning CMMs. Their first Zeiss CMM was a 1996 Prismo with a VAST probe sensor and recent investments include two Zeiss Accura CMMs. With all six machines lined up in the same room it is easy to contrast the advantage of the Zeiss VAST scanning technology against antiquated touch trigger probe sensors.
Tasked with measuring blocks and heads, as many as 60 parts in an eight hour shift pass through the metrology lab. System reliability is paramount in an environment that runs seven days a week, 24 hours per day. This client shared that “Service guys from Zeiss are great. We can’t have a machine down. The Zeiss guy would work late and long hours to get us calibrated.” He explained that they have “tried many brand CMMs over the years. One problem has been getting factory service or parts for machines over 15 years old. But Zeiss has parts and service for our Prismo” a 21 year old machine.
Another value is through put or machine cycle time. Engine blocks are big and have lots of dimensions. Engine heads can have many small details. Full inspection of a block using Zeiss Aktive Scanning technology is around 30 – 35 minutes. Compared to touch trigger probes, scanning not only measures faster, it gives this client form measurements such as cylindricity, roundness and flatness not available on a low information touch trigger machine.
And a discussion with machine programmers will reveal the power of object oriented software technology found in Calypso software. “We use Zeiss over Sheffield because of mini plans. When the shop changes a tool, we have to measure a part. Sheffield requires we run the whole program. Zeiss Calypso can run a mini plan and save time.” Calypso’s object oriented technology enables a user to simply click on any dimensions within a measuring plan and execute just those chosen dimensions. No special editing, no copy-pasting, no extra program for partial inspection needed. Using Zeiss Calypso you will not be constrained to the top down logic found in most contemporary CMM software.
If you want to learn more about the value of partnering with Inspection Engineering and Carl Zeiss please contact us today!


